Here’s our guide on what to see and how to see it in the Zhangjiajie National Park.
If you don’t like reading or following long, detailed instructions, you can do what we did and simply book a room at Zhangjiajie Yijiaqin Hotel, and the owner Shi Wan Tang or his daughter will plan your days for you!
Overview
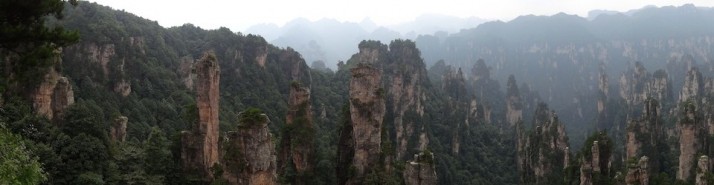
Zhangjiajie National Park, the highlight of our second tour of China
Pronounced “Djang-Jar-Jay”, the Zhangjiajie National Park is stunning, and well worth the effort to see should your plans take you even remotely close, or even if they don’t.. ;o)
The city has a small airport, but we arrived by overnight train from Wuhan via YiChang, and although it is a little out of the way there are lots of trains passing through so it’s well connected and easy enough to get to.
Day 1 – Tianmen Mountain
The easiest of the sights to visit is Tianmen Mountain. It’s south of the city and easily reached on the longest cable-car journey in the world from a station right in the centre of town (and one block away from the Zhangjiajie Yijiaqin Hotel!)
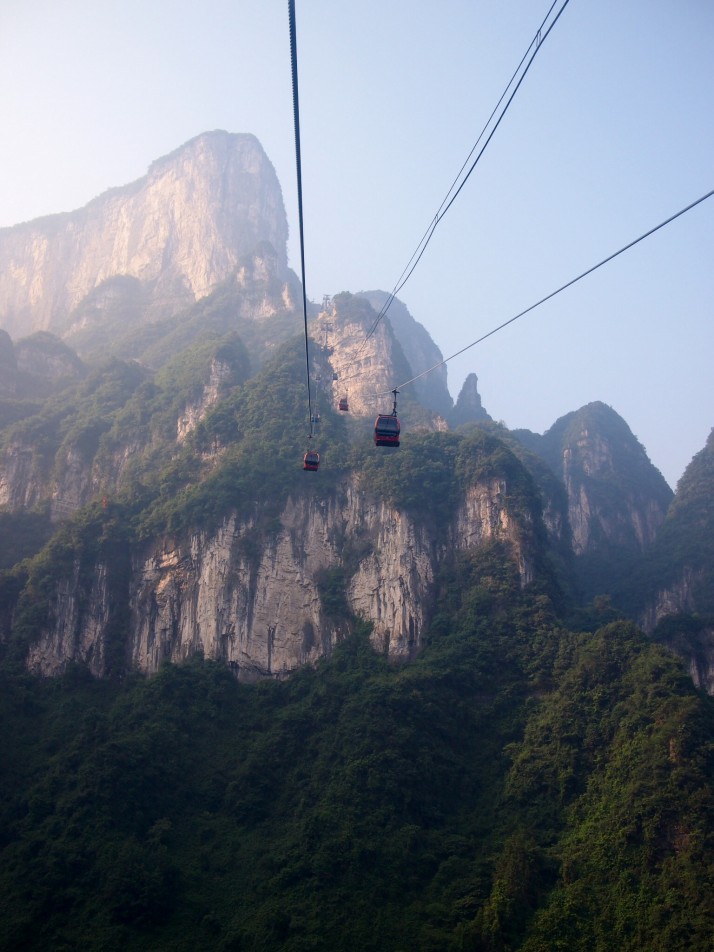
Tianmen mountain cable car, the longest in the world at almost 7.5km
Tickets cost ¥258 return (about £26/$42), and the journey takes about 30 minutes. Aim to get to the cablecar station around 07:15 (yes, AM) – the first car leaves at 8am, but if you turn up just after 8 then your queuing time will quadruple to 2 hours. At least.
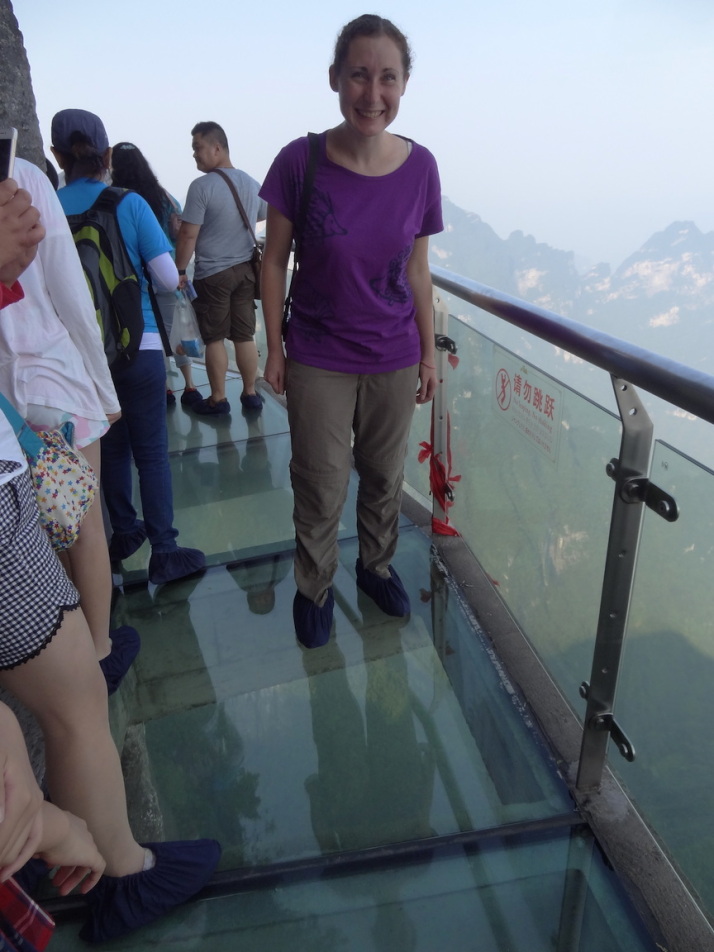
Fearless Julie on the glass walkway
On the top, take an anti-clockwise route along the edge and you’ll arrive at the entrance to the Glass Walkway – a section of the path that juts out of the karst with a glass bottom so you can
shit your pants see all the way to the forest below. There’s a small extra charge for the Glass Walkway of ¥5 return (about £0.5/$0.8)
There’s a selection of food stands at the north near Tianmenshan Temple, and south-east near the cablecar station. While the bottled water is cheaper in the city, it’s not much more expensive at the top. There are plenty of toilets too.

The “999” steps up to the natural Tianmen Cave (it’s not quite 999 steps, but it is pretty steep!)
After taking the cliff’s edge path all the way around, take the cablecar halfway back to the middle station, and after a short wait take the free bus to the foot of the Tianmen Cave. There are 3 restaurants here and it looks like there’ll be more opening soon on the same underground level as the toilets.
From where the bus drops you, climb the 999 steps to walk through the hole where Alain Robert, the “French Spiderman” had climbed to the top and back unaided in 40 minutes – see if you can find the bronze cast of him climbing up the wall!
From the cave, head back down the 999 steps, take the free bus back along the twisting valley roads and then the cablecar back to the city.
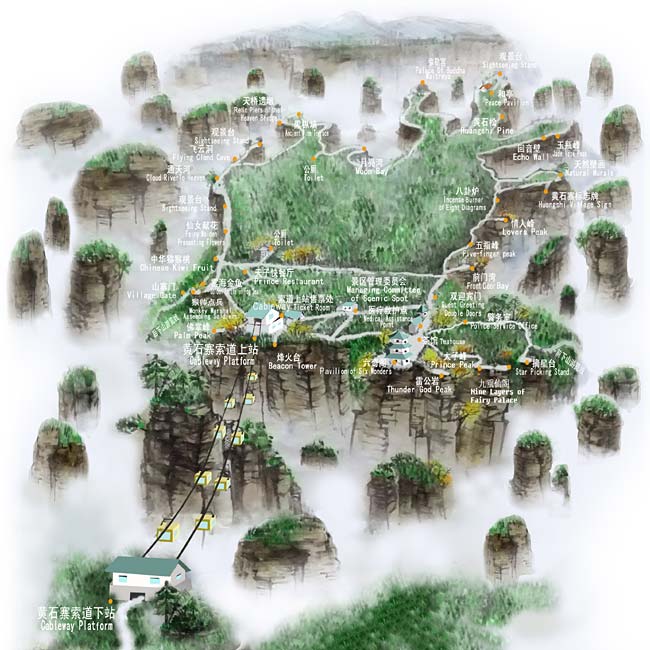
Day 2 – Huangshi Village
Another early start, again to beat the cablecar queues, but as it’s about an hour to the cablecar you need to be at the Zhangjiajie central bus station no later than 7am.
Pay on the bus, so after passing the x-ray bag scanner, walk straight through the bus station toward the buses, and once outside turn left then follow the fence as it turns right 90° then left 90° and it’s the second gate on your right, but you’ll be spotted by the helpful ladies at the desks and waved onto the right bus! (they’ll assume, correctly, that you’re heading for Zhangjiajie National Forest Park Entrance)
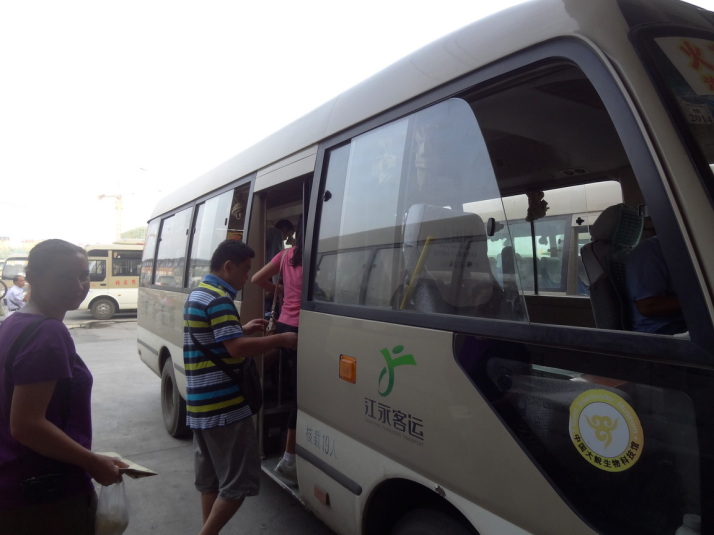
Boarding the bus from Zhangjiajie bus station to the National Park entrance
The bus costs ¥10 (£1/$1.60) and takes 45 minutes to reach the Zhangjiajie National Forest Park entrance, where you’ll need to buy either a 3-day or a 7-day pass from the ticket windows to the left of the path, which are ¥248 (£25/$41) or ¥298 (£30/$49) respectively. You get a nice plastic entry card which you can keep as a souvenir, and when you pass through the gates you need to touch it to the gate and offer a thumb or finger for the scanner.
Once inside the park, follow the path (and the crowds) and you’ll reach Oxygen Square in about 5 minutes. Take the road to the left and after about 100 metres there’s a bus stop on your left where you can take the free bus to Huangshi Village Cableway. The bus takes about 5 minutes, or if you want to walk to the top there’s a path from Oxygen Square which will take about 90 minutes.
If you took the bus, buy your ticket for the cablecar at the windows to the right of the stairs which is an extra ¥118 (£12/$19) return. We arrived here at 09:00 on the dot and the queue was about 30 people so we were on our way in about 10 minutes!
I think it’s better to get the backward-facing seats, because you can turn around and have unrestricted views of this spectacular journey, like this:
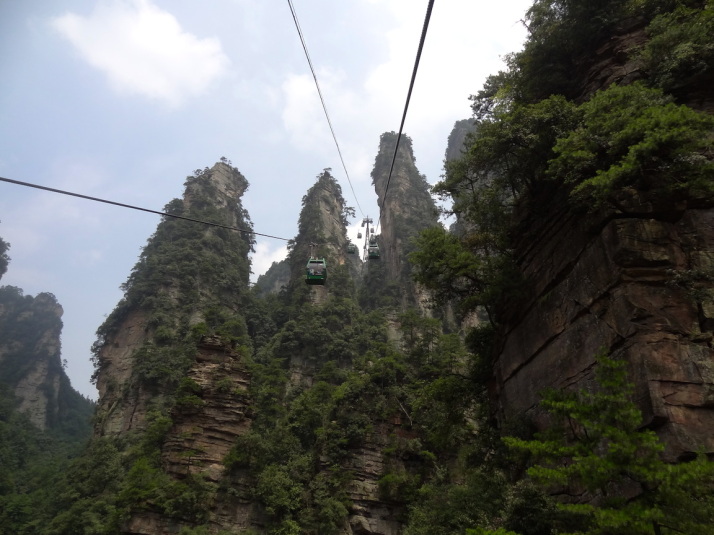
View from the cablecar up to Huangshi Village – it’s short, but it’s our favourite because of the dramatic scenery passing between the karsts
On the top, turn left and take the cliffside path clockwise around the top as the views will just keep getting better and better. It took us about 2 and a half hours to circumnavigate but we’re slow as we take a lot of photographs. There are some snack stalls (we can recommend the fried potatoes) and toilets on the top to the east of the cablecar station, and if you want to walk down there’s a route that’ll take about an hour that starts near the cablecar station.

Just one of the many stunning views from Huangshi Village
Note that there are monkeys on Huangshi and if you’re carrying a bag in your hand they will try to snatch it from you – quite aggressively too – because they’ve learned that people carry their food that way. We had our food in our rucksack and the monkeys weren’t interested at all.
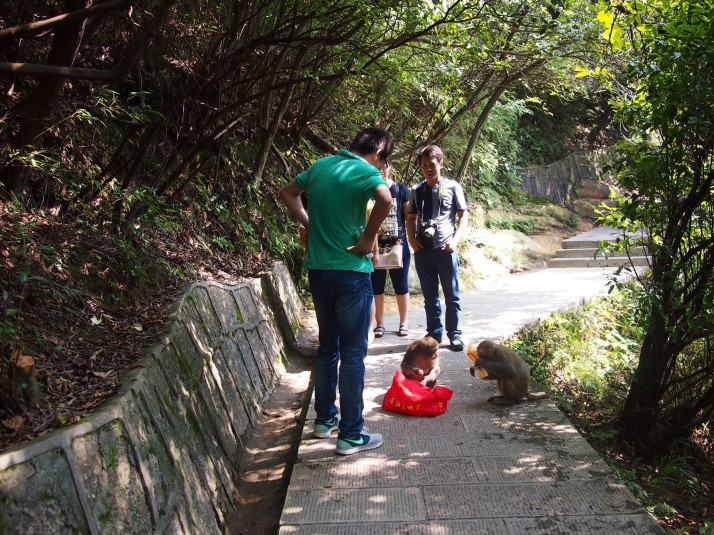
Beware: monkeys will go through any bags you carry in your hand!
Back at Oxygen Square which has a few statues and a nice garden, we took the Golden Whip Stream walking path, which comes with the same warning about carrier bags and mischievous monkeys.
The trail was busy with bunches of tour groups that were mostly going in the same direction, and the trees and karsts provide welcome shelter from the sun. There are plenty of toilets along the 3 hour walk, and there are a couple of food stalls too.
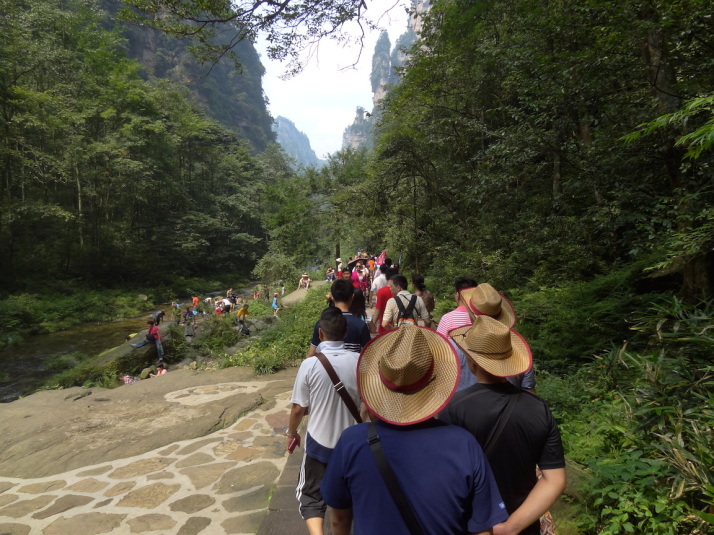
The Golden Whip Stream walking trail can be busy at times. This is a rare narrow section of the trail
The trail ends at “Water Winding Four Gates” where you catch the free bus to the Wulinyuan entrance to the National Forest Park. As the trail ends the road opens up. Take the road to the right and look for the big buses and the bus station queue. Check with the driver that they’re going to Wulinyuan, and it’ll take about 30 minutes with 2 possible stops along the way. You’re at the right one when you see a massive pagoda.
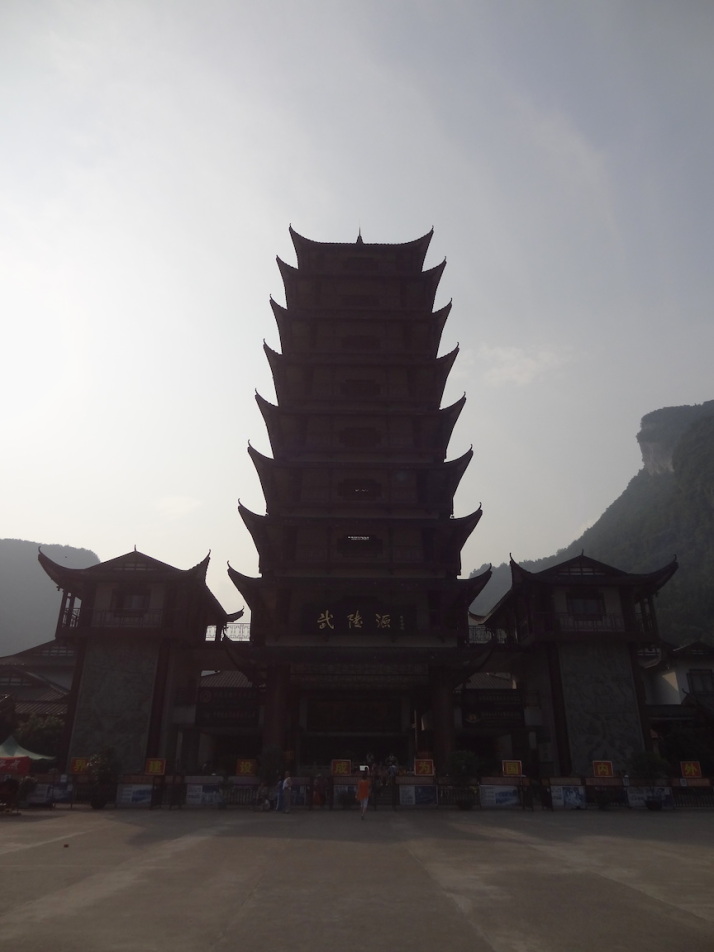
The pagoda that greets you at the Wulinyuan Park entrance. You’ll be seeing this again tomorrow..
Leave the park to the right of the pagoda, and stay on the footpath to the right of the road. After 300-400 metres you’ll see a beat-up old bus or two waiting for you – you want bus number 1. It’ll cost ¥1 or ¥2 (£0.20 /$0.32) to go about 3 blocks to the Wulinyuan Bus Station (which you could walk to if you prefer), then take the bus back to Zhangjiajie (“Djang-Jar-Jay”) which takes 45 minutes and costs ¥12 (£1.20 / $2).
Day 3 – Tianzi Mountain, Tianqiao, and Heaven Pillar (Hallelujah Mountain)
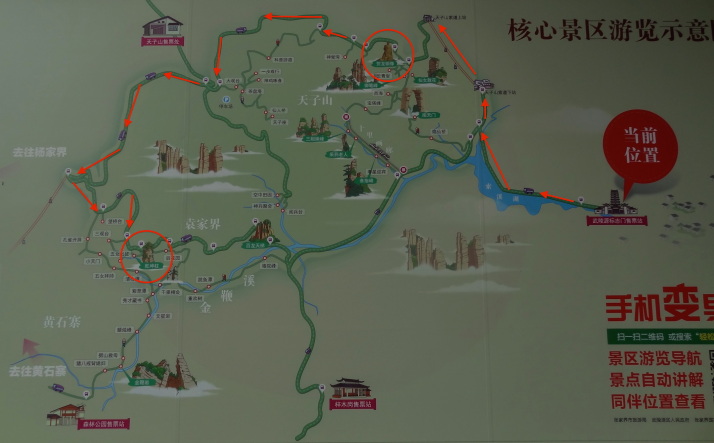
Map of day 3: Tianzi Mountain (circled top right), Tianqiao and the Heaven Pillar (Hallelujah Mountain, circled middle-left)
Day 3 starts by retracing our last steps from the end of day 2. It’s another early start – maybe even earlier as our destination is the biggest and busiest of the karsts in the park.
Quick recap: Get to the Zhangjiajie central bus station no later than 7am, preferably earlier if you really dislike queuing. Again you pay on the bus, so after passing the x-ray bag scanner, walk straight through the bus station toward the buses, once outside turn left then follow the fence as it turns right 90° then left 90° and it’s the second gate on your right, but you’ll be spotted by the helpful ladies at the desks but make sure to tell them you want Wulinyuan or they’ll point you at the wrong bus!
The minibus to Wulinyuan is about 45 minutes and costs ¥12 (£1.20 / $2). You’ll likely be dropped just outside Wulinyuan Bus Station, and there’s no need to go into the station itself as the No. 1 bus will pick you up from the same spot and take you pretty much to the Park Entrance.
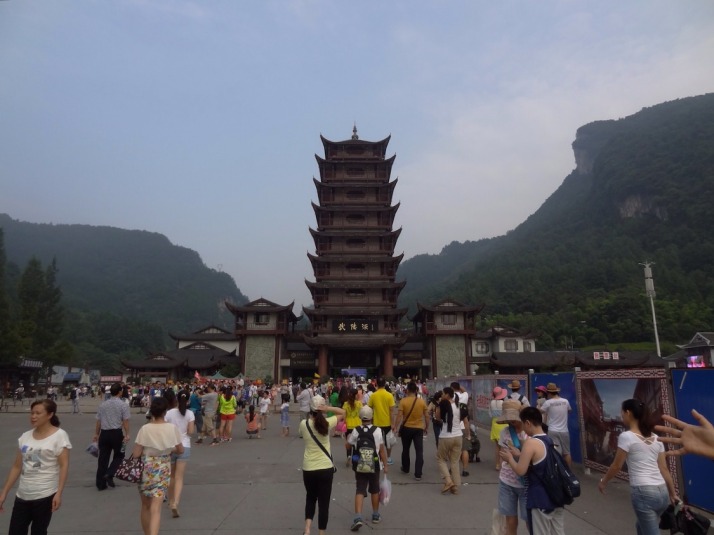
The massive Wulinyuan park entrance pagoda
Head straight to the massive pagoda, the turnstiles are inside to the right, and the free park buses leave just beyond the gates once you’re in the park.
Get on the free park bus, but check with the driver that they’re stopping at “Tianzi” as they might point you at a different one. It should take about 15 minutes to reach the Tianzi Mountain Cableway. We got here about 08:45 and the long queue that had already formed took 90 minutes to reach the front! Get here as early as you can, but be prepared to camp out as the cablecar starts running at 09:00. It costs ¥67 (£7/$11) one-way.
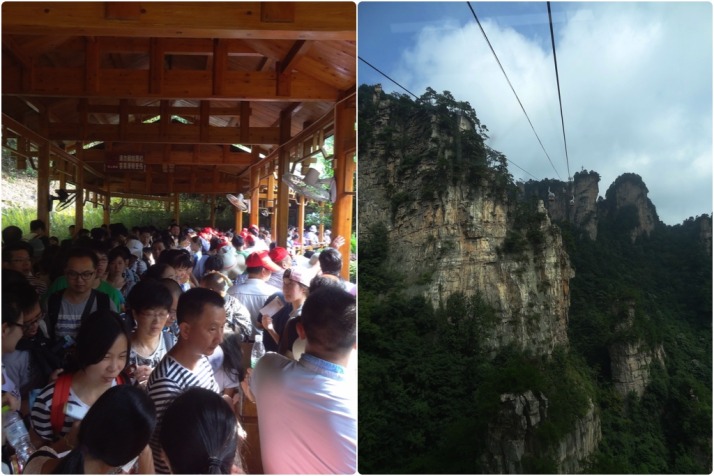
Tianzi Mountain – the queue you’re trying to avoid by getting there earlier than we did, and the fantastic cablecar journey you’re queueing for
At the top there’s a free shuttle bus that takes 5 minutes to go from the Upper Cablecar station to the Helong Park stop, where you’ll find a big map of the area at the top of the steps to Helong Park. The steps take you to a row of souvenir shops and of all things, a McDonalds. Yep, even here you can buy a McFlurry. Follow the path to the left which should be signposted Tianzi Pavilion.
Tianzi Pavilion is about an 8 minute walk, and this Helong Park area is a criss-cross of paths to little sights including the grave of Marshal He Long, a decorated General who now has an enviable view from his final resting place.
There is a path down from here along Wolong Ridge that includes a ride on the park’s short train, which drops you about half-way between Water Winding Four Gates and the Wulinyuan entrance gate. We didn’t take route so I don’t have any more details.
Once you’ve seen all the sights at the end of all the little winding dead-end paths in Helong Park, retrace your steps north back to the road and follow it west where you’ll find a row of stalls mostly selling food. Just beyond you can pick up the bus again and take it all the way to Tianqiao. Again, check with the driver that the bus is going to Tianqiao, and the journey should take about 30 minutes.
You’ll find Tianqiao stop to be a busy, manic mess of people and food and souvenir vendors. We didn’t see any signposts, so we just took the most obvious looking alley between the souvenir stands to the right of the bus park. The trail takes a long, winding route over and then past “Greatest Natural Bridge” and a few more named viewing spots before you reach the most famous sight of the park – Heaven Pillar – otherwise known as Hallelujah Mountain from the 2009 film Avatar.
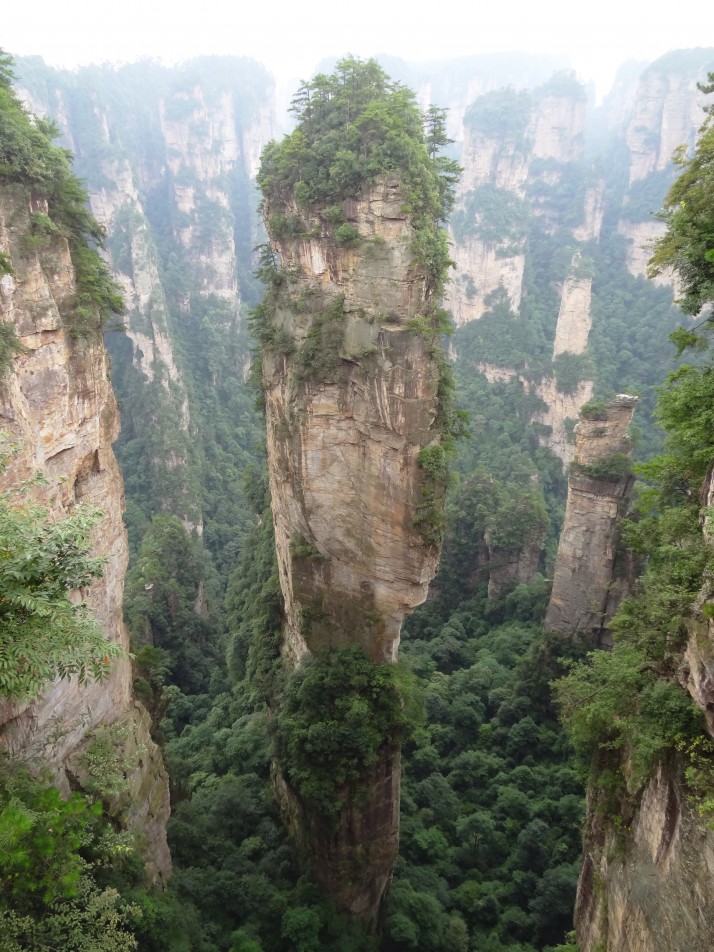
The now famous Heaven Pillar, otherwise known as Hallelujah Mountain in the movie Avatar
Once you’ve taken plenty of photographs, including a few of you on the back of a Mountain Banshee, continue on towards “Enchanting” where the path forks. Right will take you to the “Back Garden”, left will take you to the Enchanting bus stop, where you can catch the free, 8 minute bus to the top of the Bailong Elevator – a giant outdoor lift with amazing views of the valley as you descend into it. Don’t forget to buy your ticket from the ticket office where the bus drops you off, as it’s a 5 minute walk to the elevator itself! Tickets are ¥72 (£7 / $12).
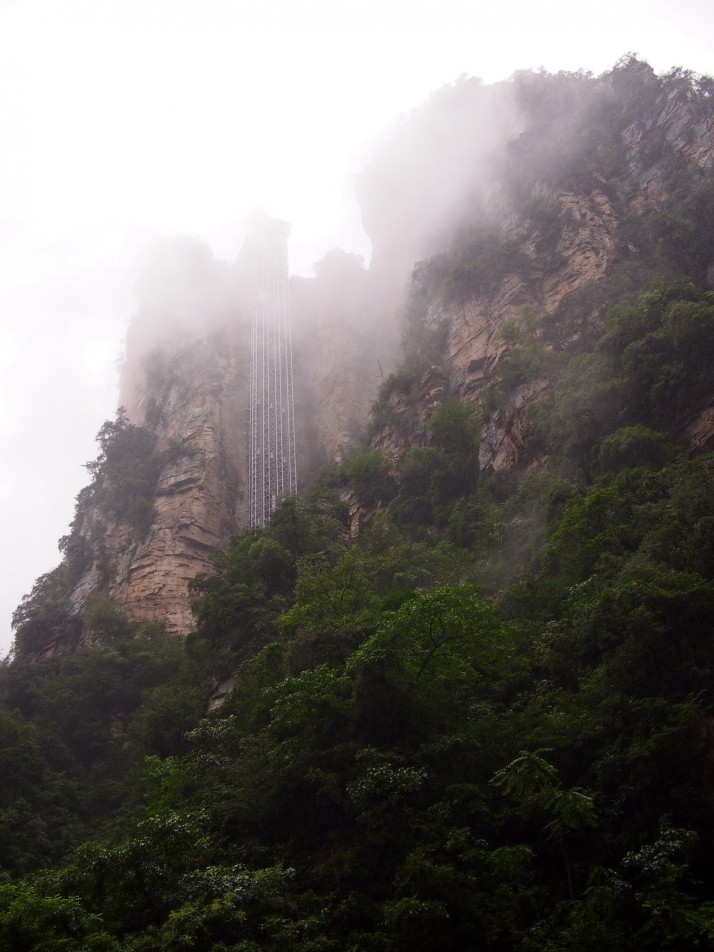
The thrilling Bailong Elevator which has a tunnel exit almost as long as the ride up the mountain!
At the bottom, you’ll find a bus stop right outside the exit that will take you all the way back to the Wulinyuan entrance, which takes about 45 minutes. From there it’s the same trip back to Zhangjiajie as yesterday.. leave the park to the right of the pagoda, and stay on the footpath to the right of the road. After 300-400 metres you’ll see a beat-up old bus or two waiting for you – you want bus number 1. It’ll cost ¥1 or ¥2 (£0.20 /$0.32) to go a couple of blocks to the Wulinyuan Bus Station (which you could walk to if you prefer), then take the bus back Zhangjiajie (“Djang-Jar-Jay”) which takes 45 minutes and costs ¥12 (£1.20 / $2).
 two year trip
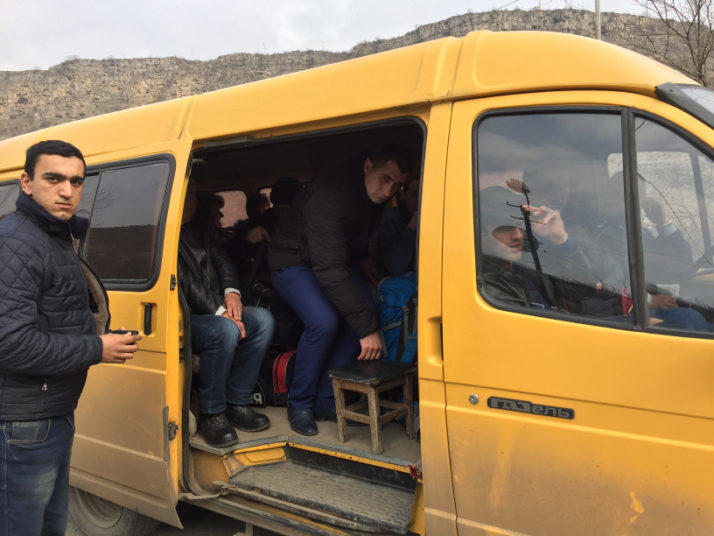
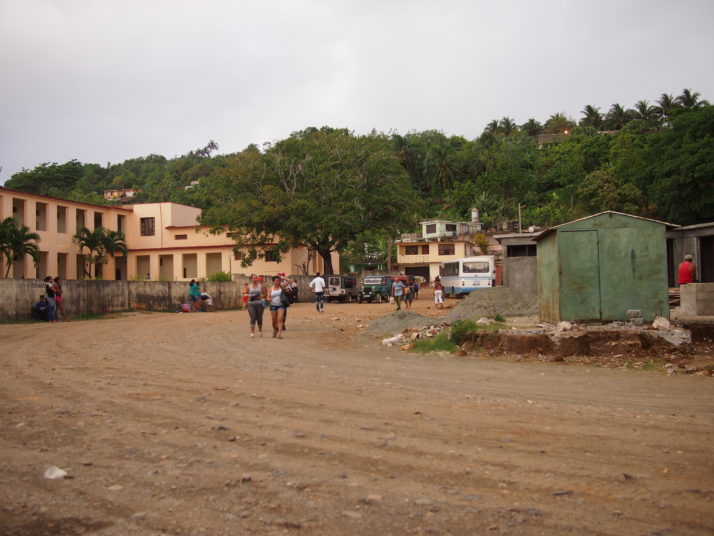 Local transport yard in Baracoa
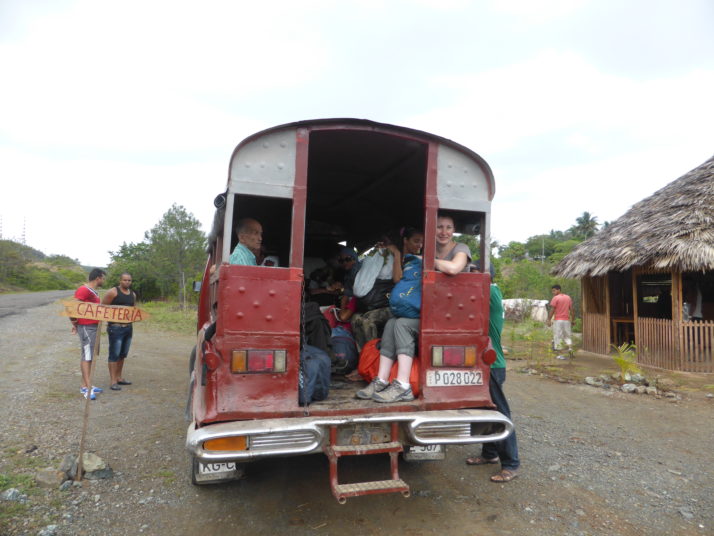 Julie in the back of the passenger truck from Baracoa to Moa
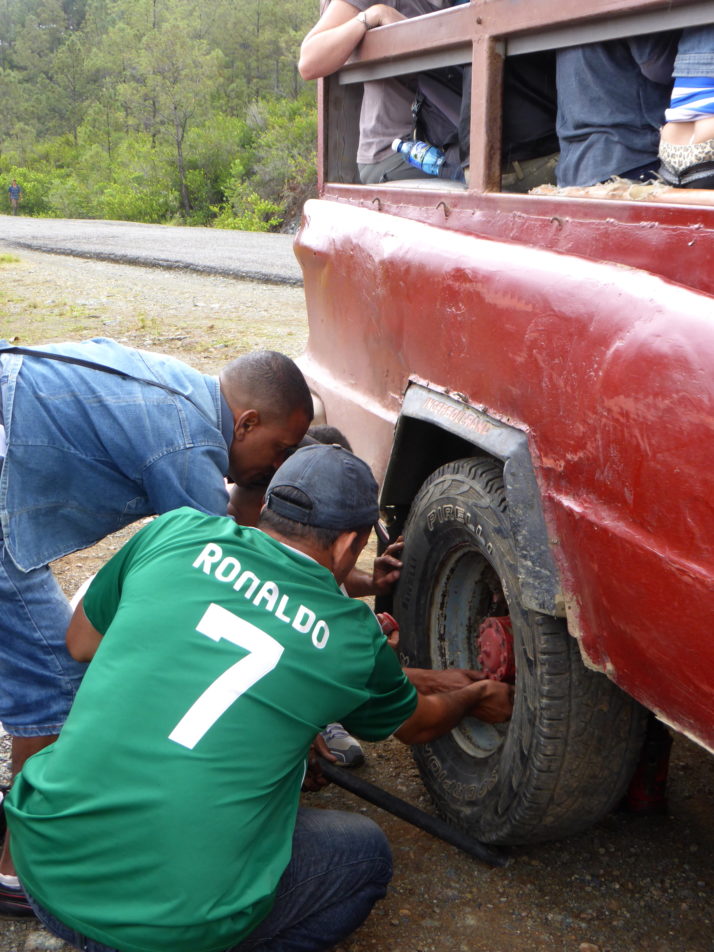 How many Cubans does it take to change a wheel…
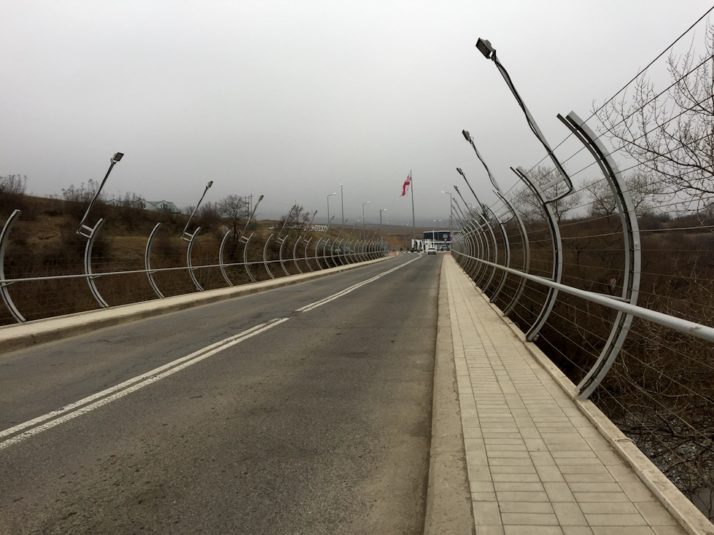
 Bus station at Moa
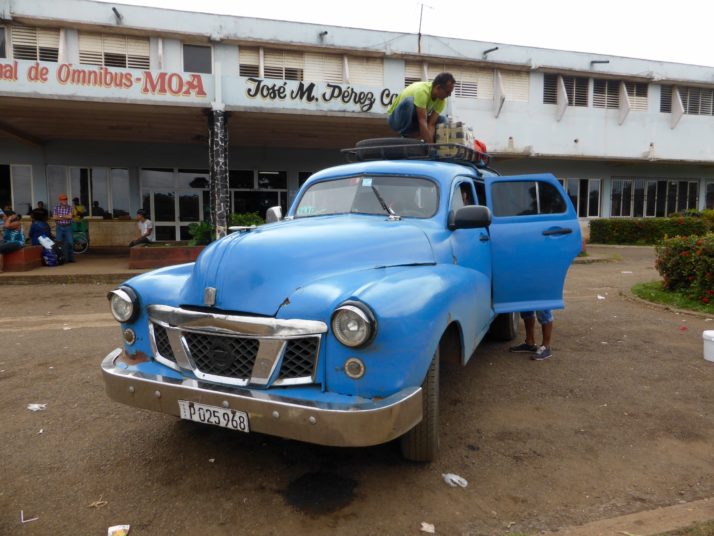 Our large bags were stowed on the roof
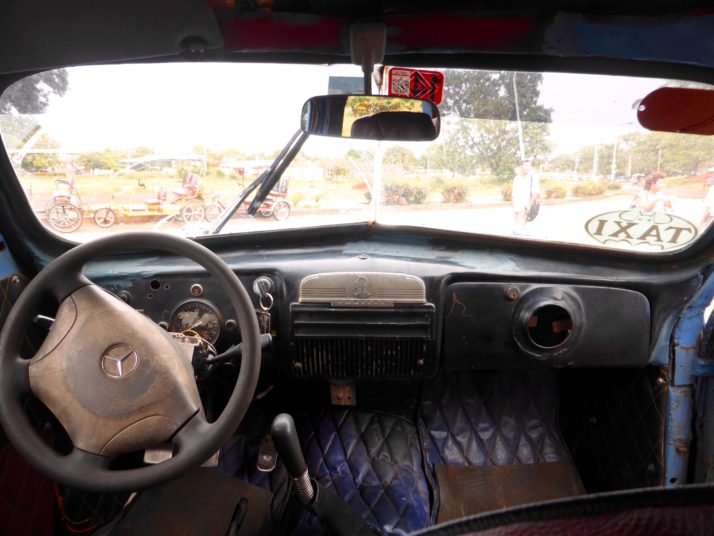 Our colectivo taxi from Moa to Holguin was a very old Pontiac (with a slightly newer Mercedes steering wheel!)
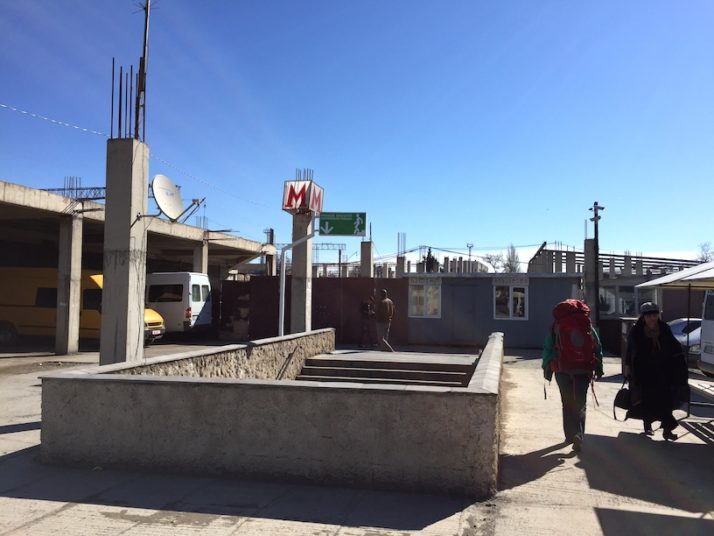
 Intermunicipal Bus station in Holguin
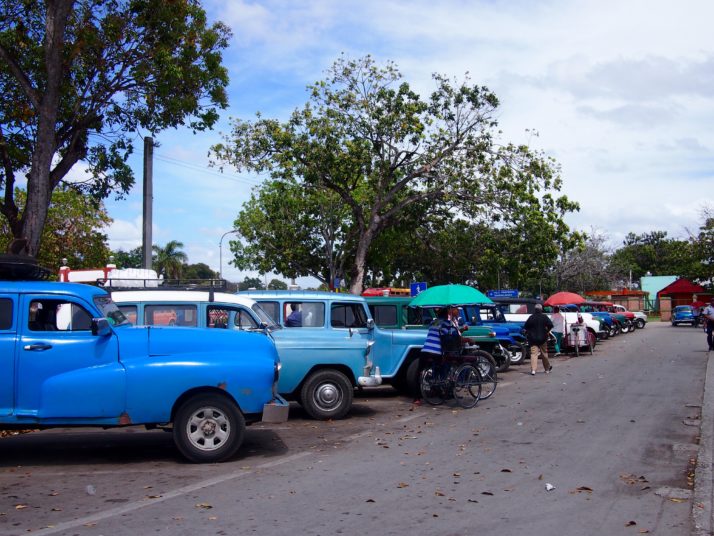 Colectivo taxis outside the Intermunicipal Bus station in Holguin
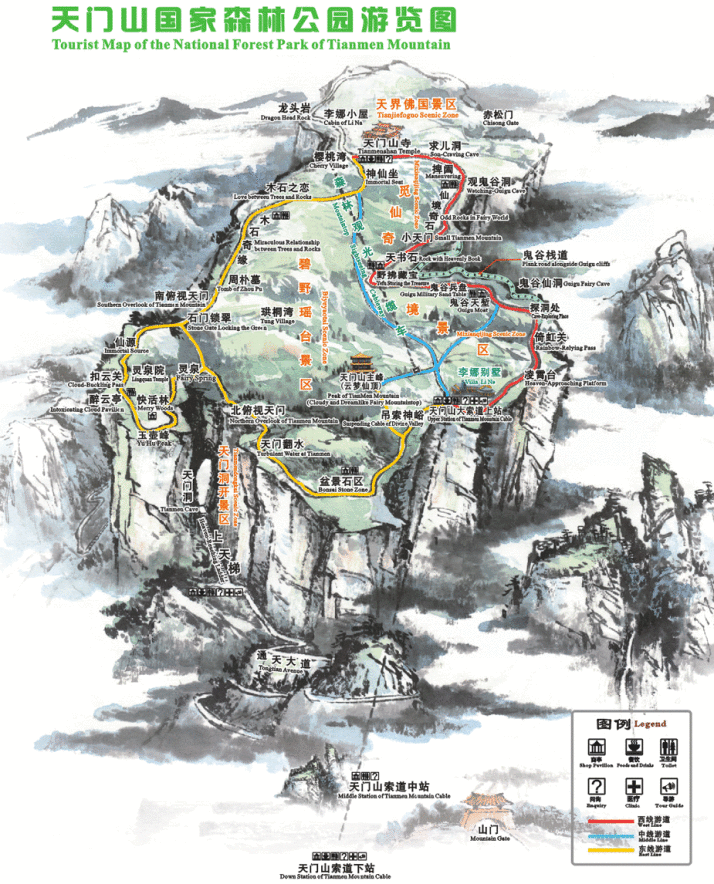
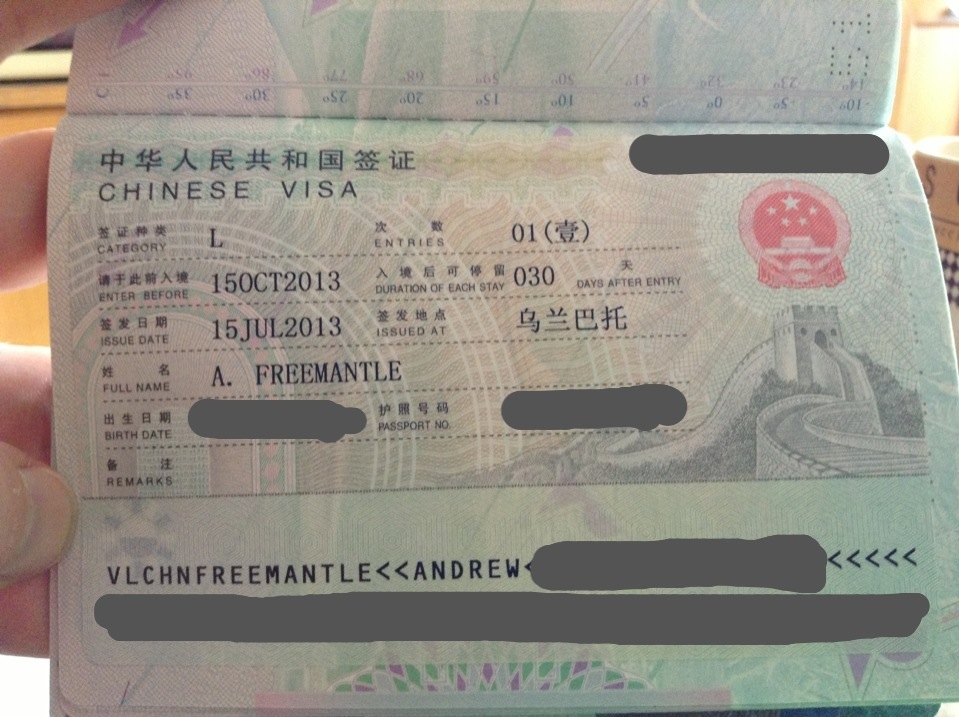 Andrew’s Chinese Visa
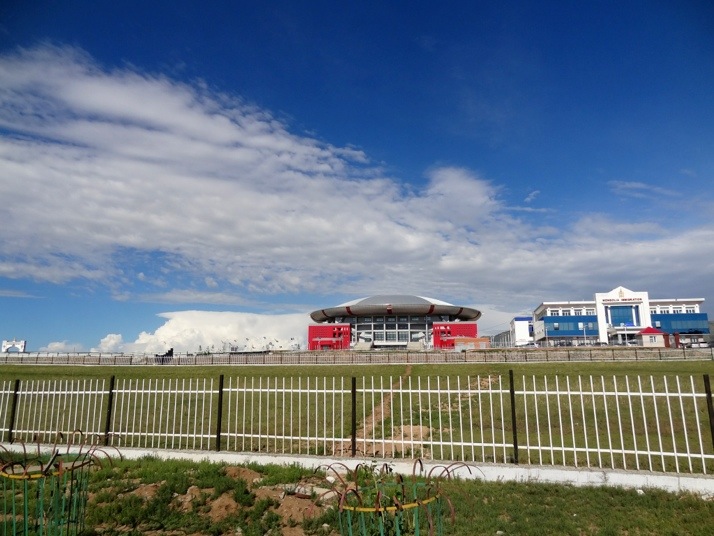 The right-most blue and white building is the The Office of Immigration, Naturalisation and Foreign Citizens (INFC) in Ulaanbaatar. You can just see the Ulaanbaatar welcome arch to the left, look out for the big red and white building with the circular roof which is next door and clearly visible from the main road
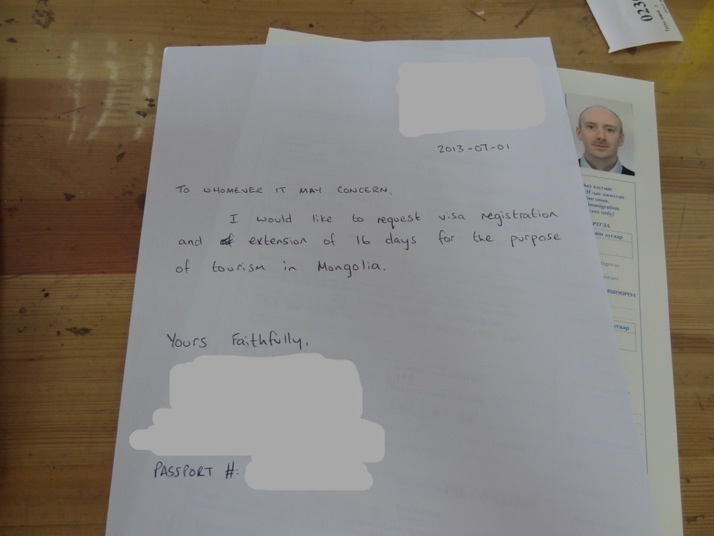 The Visa Explanation Letter I submitted